|
Elevated Deer Blind
|
At first I just wanted to build a platform to put a pop-up blind on but Ryan had bigger plans so I decided to follow and see what we could build.
We used a combination of materials we had lying around our barn and new lumber from the local lumber yard. If we could have found enough wood in the barn to build a decent blind we would have, but unfortunately this wasn't the case. We had to purchase all of the OSB and about half of the 2x4’s that we used.
The dimensions of our deer blind are 6 ft. x 6 ft. and an inside height of 5 ft. 6 in. sloping down to 5 ft. 3 in. The bottom of the platform is 8 ft. 3 in. above ground.
For the four legs we used 4x4's and 4x3's that we already had. They were all a little over 10 ft. long and a couple were less than straight. We anchored them about 2 ft. into the ground.
The ideal here would have been to use treated lumber and at over 8 ft. off the ground it would have been nice to use 6x6’s. I would also liked to have used concrete in the holes as well.
We used old 2x4's to frame the floor, attaching them to the uprights using 1/2 in. bolts. We also used three additional 2x4's as floor joists. I call these 2x4's old, but they were very hard. We had to pre-drill holes in order to nail into them.
We used 7/16 in. OSB for the floor, walls and roof.
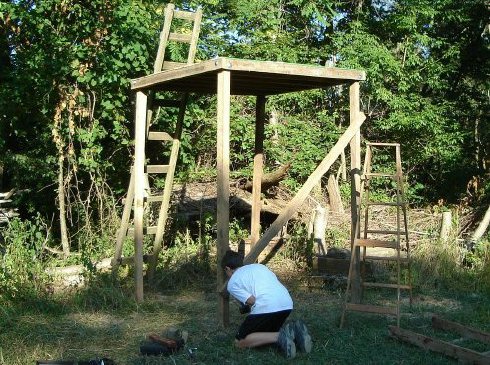
After installing the floor we noticed that the platform was a little unstable so we added angled braces to each side, which stabilized the platform. The four braces stabilized the platform quite nicely.
This picture was taken as Ryan was attaching one of the braces.
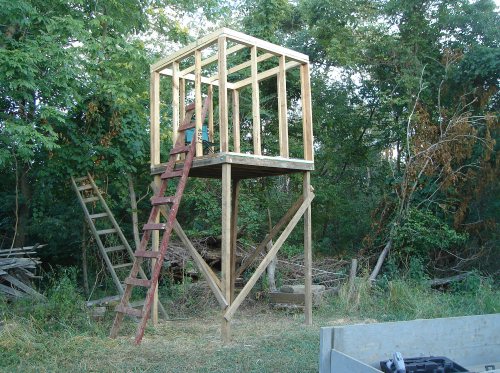
We framed the side walls in a similar manner to framing a house using 2x4's, but we put them on 2 ft. centers. We also framed the roof in the same manner and used both nails and screws to attach it to the side walls. Once all of the framing was nailed down the structure was quite stable, but I wasn't ready to swing on the roof rafters yet.
The following pictures show the blind after the framing was completed. The second picture is closer to show more detail. Notice that we had a chair on the platform to see where we needed the front opening to be placed. Don't let Ryan tell you that I just sat around while he did all of the work.
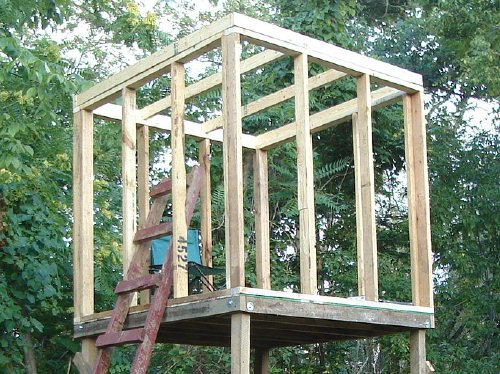
We nailed OSB to the framing leaving a 2 ft. high window in the front, 2 ft by 2 ft. windows in each side and a 2 ft. wide door in the back. Ryan framed in the large front window so he wouldn't have any vertical 2x4's in his view. I wouldn't have bothered with this but he wanted to do it and it worked out real well. Once we started nailing OSB to the framing, the structure became much more solid.
If I were to build another deer blind I may put the OSB on the frame while it was up on the platform before I set the frame upright. Nailing the OSB on the sides was difficult and would have been much easier while lying flat. I had wanted to lift the frames onto the platform while they were still light but we could have nailed the OSB on while they were lying on the platform.
This picture shows the deer blind with most of the OSB installed.
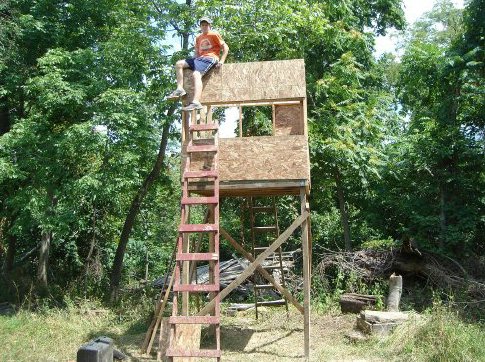
We then nailed and screwed OSB onto the roof frame leaving a 3 in. hangover and covered it with felt paper and rolled roofing leaving about a 1 1/2 in. hangover on the roofing.
The blind is finally under roof in this picture.
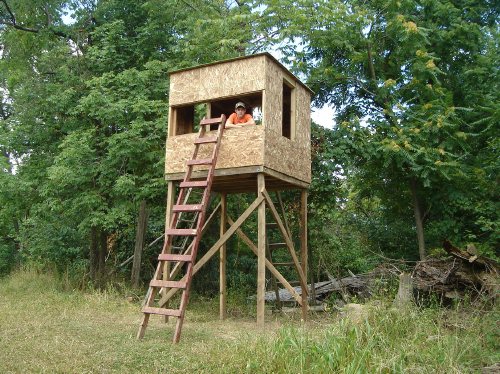
We used OSB to make hinged covers for our three windows and door.
Ryan and Megan then used exterior paint to give our new deer blind two coats of paint inside and out. We had used a deck stain on the floor just after we had completed it. We later put a piece of carpet on the floor which has made it much quieter to move around inside.
I jokingly call our deer blind the deer condo, but I'm quite sure I'll like sitting in it this year when the rain is pouring and the cold wind is blowing. I think we will be able to see a lot more of the woods surrounding the food plot and feeder, which is exciting to think about as deer season approaches.
Here is our elevated deer blind with all of the windows closed in early October.
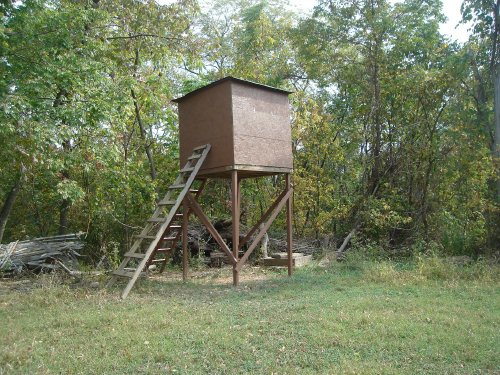
The last thing that I would like to mention is that we are certainly not professional builders. Hopefully our deer blind will still be standing strong at this time next year.
I would also like to mention that I'm not a fan of homemade wooden treestands. My experience with them is that they can be very dangerous as they deteriorate. We'll see how this new elevated blind stands against the weather and how much maintenance we need to do each year.
After using the "deer condo" for a few years I'll have to admit that I really like it. But, there are a couple of things that we may do differently if we built another one. The hinged front window has worked okay although it has swelled some and didn't close at the end of this last season. A plexiglass sliding window may work better. We also have the smaller side windows hinged to swing sideways, which allows the wind to blow them. I would also have liked to have it just a bit taller so that we could stand up straighter while we are inside of it. If we ever get the chance to build another one we'll try a few modifications.
Leave the Elevated Deer Blind Page and visit the Pop-Up Deer Hunting Blind Page .
