|
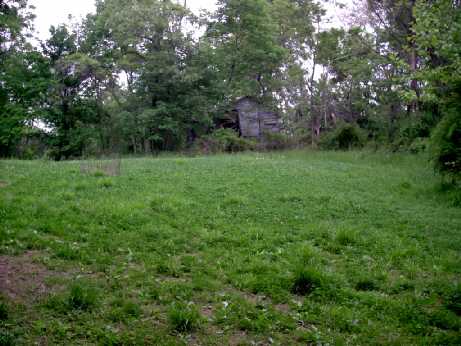
Planting Food Plots For DeerThe next step was an old set of pull behind disks that we pull with a 40hp John Deere tractor that we had purchased in the late 1980's for mowing purposes. We can generally work the ground up pretty good with these disks. When time permits, we like to disk the area once and then disk again a week or two later. The first disking seems to loosen the soil and start to kill the weeds and grasses and the second disking is able to work the soil much better. It’s difficult to determine exactly how much the food plots have helped the deer on our farm, but quality nutrition is vital and we try to enhance it where we can. We do know that they use the plots extensively and we continue to try to improve the quality of our food plots. An added bonus is that it is fun to get outside and do the work. We currently have seven food plots. They are identified by the following names; old house, middle clearing, old corn patch, garden, whippoorwill, hayfield and right of way food plots. None of these plots are very big with the largest encompassing about 1/2 acre. Over the years we have tried about ten different seed varieties and have had varying degrees of success with each of these but the Imperial Whitetail Clover has grown the best. We experimented on one occassion in the past with annuals and did not have a lot of success, but we are trying them again this year. We are getting up to 3 years with the Whitetail Clover in most places and after this the weeds and grasses usually take over. We have had some clover plots that were very heavily grazed that last only a year or two. Planting Methods
This year we have increased our lime application to over one ton per acre. We have also purchased a pull behind spreader to assist in our lime and fertilizer applications. The pull behind spreader isn't easy to use with lime but we make it work. This leaves us, and sometimes the ground, nice and white. Clover grows best at a ph of 6.5 to 7, spreading lime reduces the acidity, raising the ph. You can check on the ph of your food plots with a ph meter or take a sample and have it tested at a lab. We use a cheap ph meter and use it to check for improvements in ph. Fertilizer is then applied with an over the shoulder broadcast spreader or our pull behind spreader. Fertilizer with a low nitrogen number is used in our clover plots, or as low as we can get at the local Co-op. Nitrogen increases the competition from grass and weeds. For our annuals we try to use what is recomended on the seed bag. Additional lime and fertilizer may be applied at later dates. The nitrogen is the first number of the three on fertilizer bags followed by phosphorus and potassium. The site is disked with our John Deere tractor and pull behind disks. Ideally we like to disk once which starts to kill the weeds and grasses and then disk again a week or two later. This year we have started using Round-Up to kill all vegetation in the plot. Before seed is broadcast we drag the site with an old bedspring pulled behind an ATV to lightly pack the soil, this is where a son who likes to drive an ATV comes in handy. The seed is broadcast generally a little heavier than the planting directions call for due to the small sizes of our plots and the heavy grazing pressure they will receive. The bedsprings are then dragged over the plot again to lightly cover the seed. It is recommended that clover seed be no more than ¼ inch deep. For our bigger annual seeds we have used the disks to burry the seeds a little deeper. After this it is up to the weather, but our plots have done well in both rainy and drought years. Much of our planting process revolves around the weather and how much time we have. In the spring we try to get the plots in before grass mowing time hits hard and in the fall we do our best to fit in with the grass mowing that is still in full swing. Maybe if we would replace the grass in the yard with clover the deer would mow it for us! Planting food plots for deer doesn't have to be a complicated process. Use whatever you can to to disturb the soil and get something planted. Many whitetail food plot seed manufacturers now even make no-plow seed formulations for those that do not have a lot of equipment or for those plots that you would like to plant in out of the way places. Get out there and plant some seed, the deer have eaten everything we have planted so far.

|
